Big Data Step by Step.Part 2: Setting up the Cluster
In part 1 of this series, the selection of hardware was discussed. Furthermore we picked Cloudera as the Hadoop distribution for our experimentation cluster. In this new article, the installation of software will be performed to obtain a fully working Hadoop cluster. We can use this for the experiments in all future articles of the series. The target audience consists of Big Data Engineers on the infrastructure side, but the content could also serve as background knowledge for Big Data Developers and Data Scientists. Reproducing the steps described in this article requires some very limited Linux experience.
Parts in this series:
Big Data Step by Step. Part 1: Getting Started
Big Data Step by Step. Part 2: Setting up the Cluster
Big Data Step by Step. Part 3: Experiments with MapReduce
Big Data Step by Step. Part 4: Experiments with HBase
Network and Operating System
In article 1 we selected a machine with 4 cores and 16GB of RAM as a master and 3 quad core machines with 8GB of RAM each as worker nodes. All of these machines need network connectivity and an operating system to be able to run Hadoop.
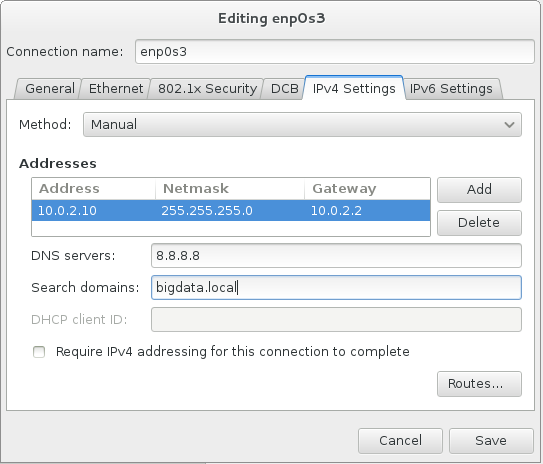
It is important to note that all machines should be able to find each other in the network by hostname. This can be achieved by either configuring a local DNS server or adding all machines in the cluster to the /etc/hosts file on all machines. In this example, the machines are named cloudera-000 .. 003 and they are located in the bigdata.local domain and the 10.0.2.0 /24 (255.255.255.0) subnet. In /etc/hosts this looks like:
[code language=”bash”]
10.0.2.10 cloudera-000.bigdata.local cloudera-000
10.0.2.11 cloudera-001.bigdata.local cloudera-001
10.0.2.12 cloudera-002.bigdata.local cloudera-002
10.0.2.13 cloudera-003.bigdata.local cloudera-003
[/code]
Of course you are free to configure the network differently, but the examples will all assume given configuration, with cloudera-000 being the master machine.
For Cloudera, the supported environments matrix shows a wide variety of supported Linux distributions, as long as 64bit versions are used. Since the Red Hat family is most prevalent in enterprise environments, we will use Centos 7 (the freely available community Red Hat distribution). An ISO image can be obtained here.
Linux Installation
Installation of the operating system is quite straightforward. Boot from the Centos DVD and follow the instructions. Perform the installation on all 4 machines. Some pointers:
– Select a minimal install with no additional components.
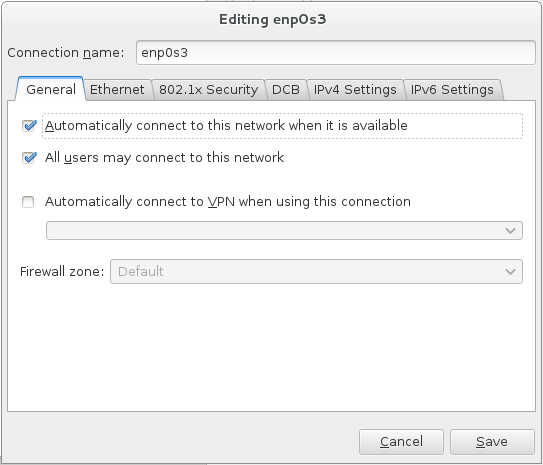
– Set the network interface to automatically connect on startup:
– Configure hostname and IP address settings like described above:
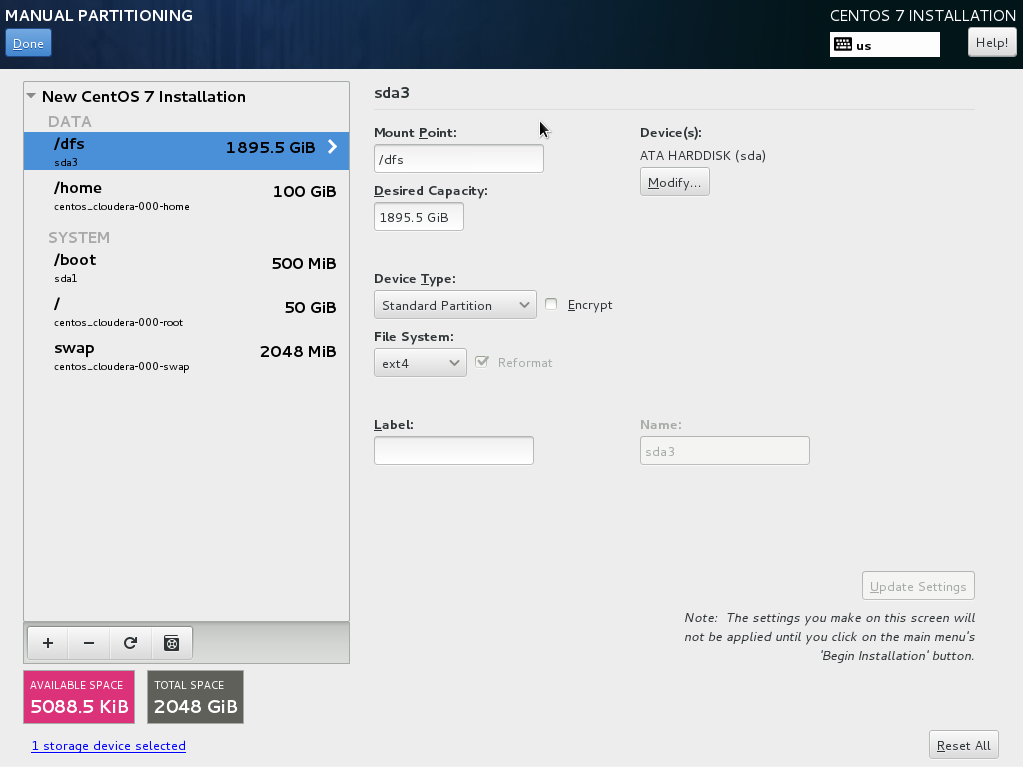
– In disk partitioning and formatting, make sure that the partition containing directory /dfs will have a lot of disk space assigned, since this is the directory where HDFS will reside. One way of achieving this is by setting an additional mount point:
– Keep the root password the same on all machines. This is not strictly necessary but it makes installation of Cloudera possible without having to perform an SSH key exchange.
– After installation is complete, reboot the machine. Afterwards there are some post-install operations that need to be performed as root user (or with sudo rights if you configured another user during the installation):
Hostname resolution
If you opt to not use a DNS server for name resolution, edit the /etc/hosts file and add all machines like described above. Do this on all machines.
[code language=”bash”]
10.0.2.10 cloudera-000.bigdata.local cloudera-000
10.0.2.11 cloudera-001.bigdata.local cloudera-001
10.0.2.12 cloudera-002.bigdata.local cloudera-002
10.0.2.13 cloudera-003.bigdata.local cloudera-003
[/code]
Firewall
The assumption is that all machines in the cluster are in a safe network environment behind a firewall. This makes the built-in Linux firewall unnecessary. The Linux firewall would require a lot of configuration, since Hadoop is very much depending on network connections across a wide range of ports. We can disable the Linux firewall permanently by using the following commands:
[code language=”bash”]
systemctl stop firewalld.service
systemctl disable firewalld.service
[/code]

SELinux
Next item is SELinux. The Cloudera Manager server will not always play nice with SELinux. We disable it by editing the file /etc/selinux/config. Change the policy from “enforcing” to “disabled”. This change only becomes active after rebooting the machine. For now we can temporarily disable SELinux with the following command:
[code language=”bash”]
setenforce 0
[/code]
Time synchronization
We need to make sure that all machines in the cluster are time-synced. NTP is the protocol to achieve this. Install and activate NTP:
[code language=”bash”]
yum install ntp// ntpdate ntp-doc
systemctl enable ntpd.service
ntpdate pool.ntp.org
systemctl start ntpd.service
[/code]
Additional packages and updates
Install some additional packages that could come in handy:
[code language=”bash”]
yum install psmisc nano net-tools wget
[/code]
Now get all packages up to the latest level:
[code language=”bash”]
yum update
[/code]
After this step, our machines are ready for installation of Cloudera!
Cloudera
Installation
The product is available prepackaged from Cloudera repositories. The only machine on which we need to perform installation steps manually is the master machine, cloudera-000. Everything on the other machines will be installed from GUI by the Cloudera manager.
Repository:
First thing we need to do is get the repository. Perform the following command as root user:
[code language=”bash”]
wget -O /etc/yum.repos.d/cloudera-manager.repo http://archive.cloudera.com/cm5/redhat/7/x86_64/cm/cloudera-manager.repo
[/code]
In case of other Linux distributions the link may need to be adjusted. The correct link can be found by opening http://archive.cloudera.com/cm5/ in your web browser and exploring the folders to find cloudera-manager.repo file for your OS version.
Install packages:
As root, install the Cloudera Manager packages:
[code language=”bash”]
yum install cloudera-manager-daemons cloudera-manager-server
[/code]
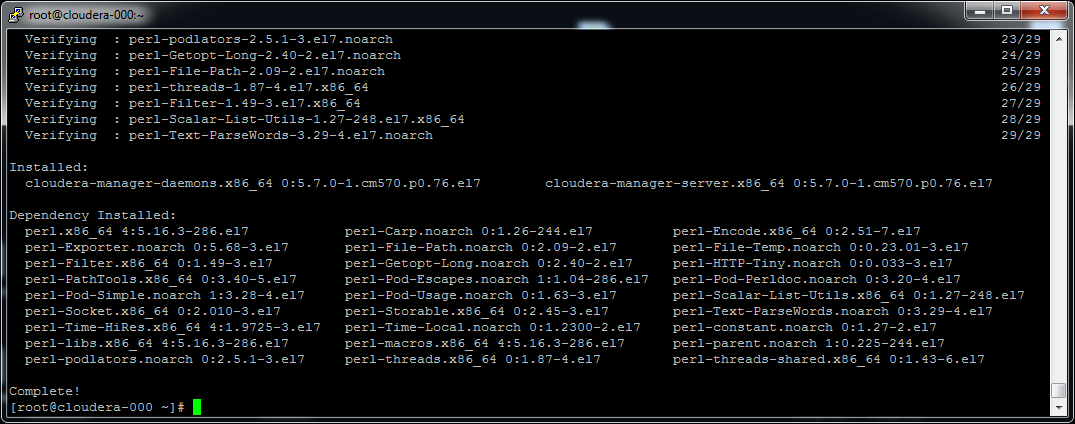
Similarly, install the Cloudera Manager Database:
[code language=”bash”]
yum install cloudera-manager-server-db-2
[/code]
Now install the Java JDK from Cloudera repository:
[code language=”bash”]
yum install oracle-j2sdk1.7
[/code]
Start components:
Start the database:
[code language=”bash”]
systemctl start cloudera-scm-server-db.service
[/code]
If you encounter errors like “Failed to start LSB: Cloudera SCM Server’s Embedded DB”, please recheck if you disabled SELinux, like described above.
Start the Cloudera manager server:
[code language=”bash”]
service cloudera-scm-server start
[/code]
Cluster Configuration
The web interface should now be accessible at http://cloudera-000.bigdata.local:7180/ :
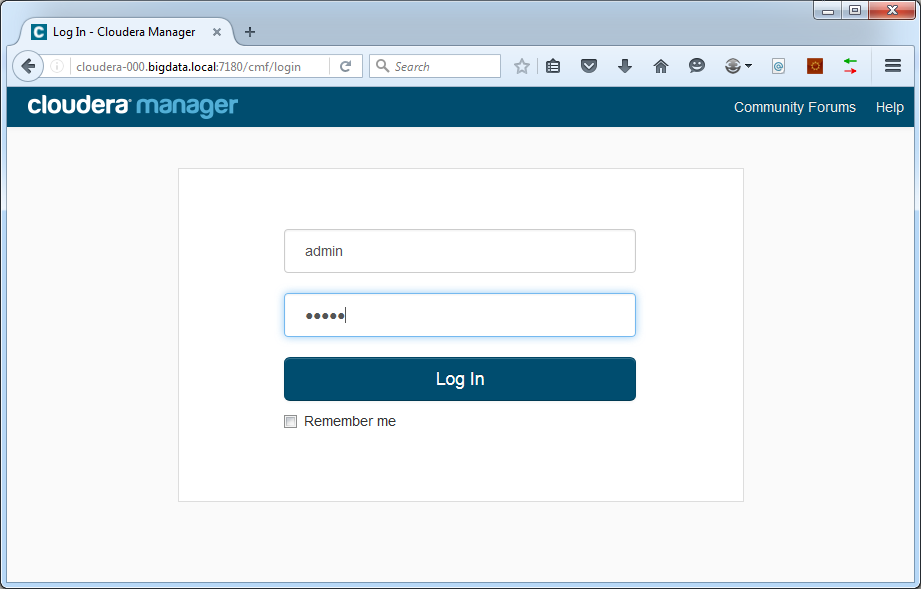
The default username and password are:
Username: admin
Password: admin
We will change those later.
Accept the license terms and pick Cloudera Express to use the free version. This is a fully functional Hadoop distribution that only misses some premium extensions that we are not going to use in this series.
Now we can enter the hosts that will be part of our cluster, one on each line. Include the master node:
[code language=”bash”]
cloudera-000.bigdata.local
cloudera-001.bigdata.local
cloudera-002.bigdata.local
cloudera-003.bigdata.local
[/code]
Now press the Search button. Cloudera Manager will try to connect to all hosts in the list. It will scan if SSH is available and if Cloudera components are already running:
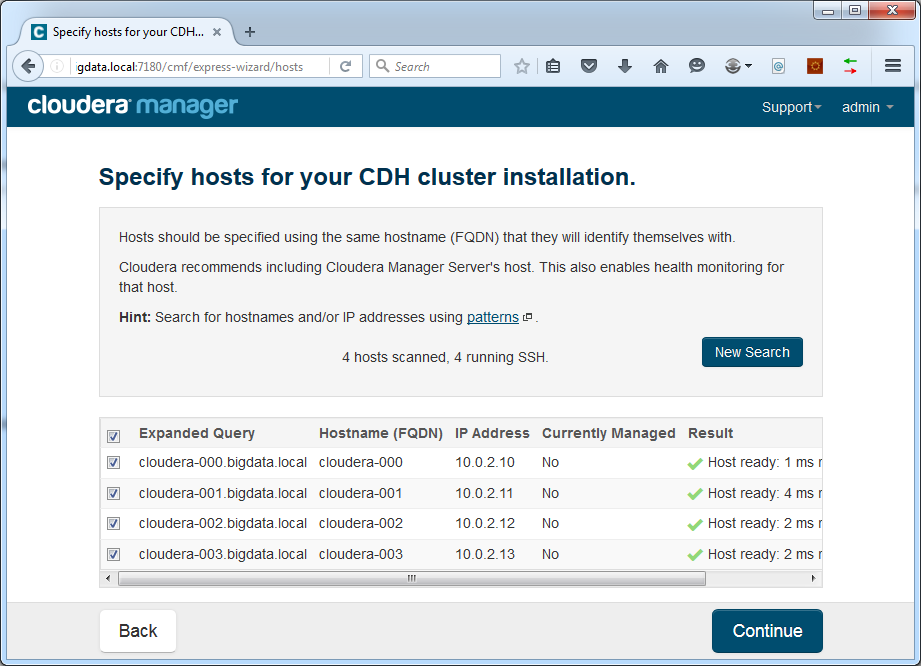
In case of trouble finding hosts, please verify the settings of your DNS server or /etc/hosts file as described above. Try to ping all hosts from command line on the cloudera-000 machine.
Press Continue.
On the next page, leave everything default (use parcels, most recent CDH version, no additional parcels, matched release for hosts).
Press Continue.
Accept the license agreement and enable the install tickbox for Java.
Do not use single user mode.
Choose to log in to all machines as root with the same password, unless you chose to perform an SSH key exchange of course:
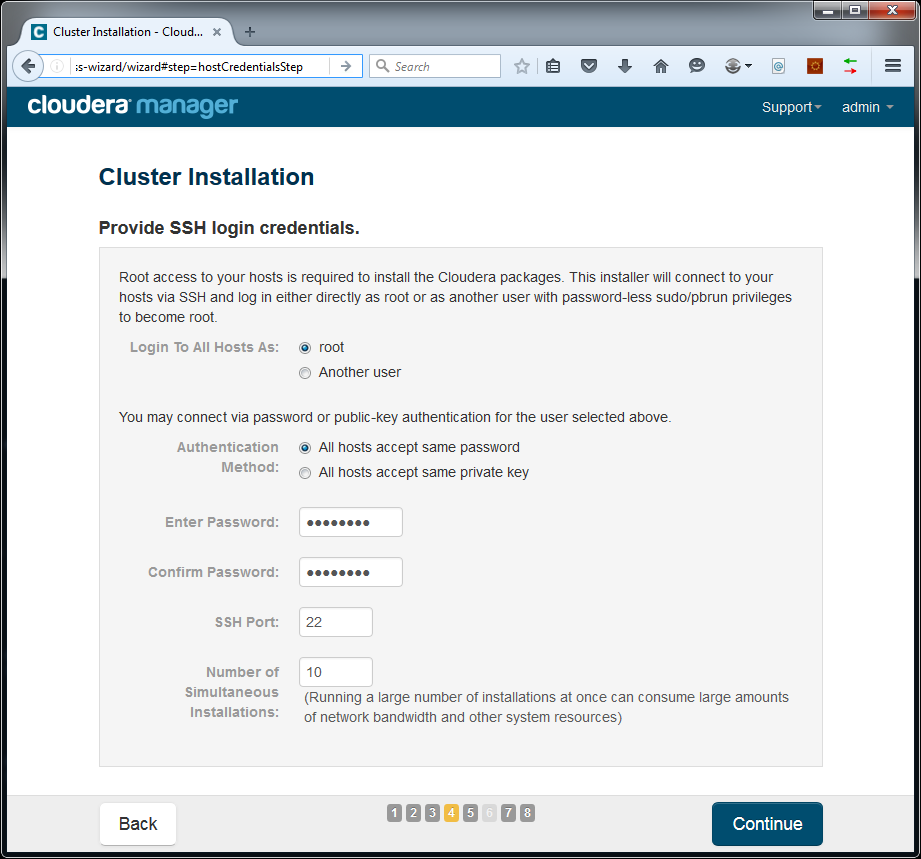
Press Continue. Cloudera Manager will start making the hosts ready by remotely installing the Java JDK and Management Agent:
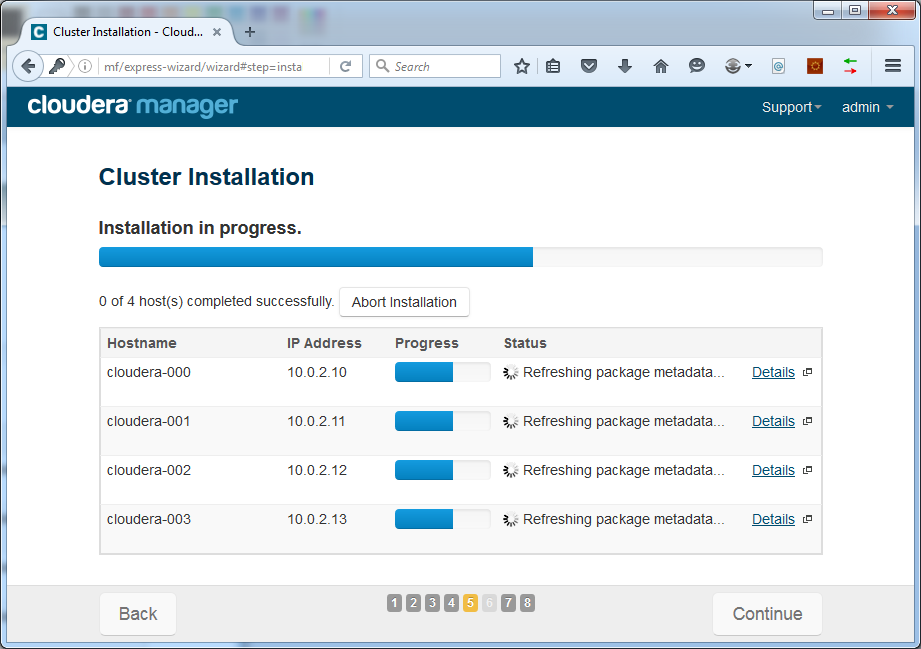
This could take a while to finish.
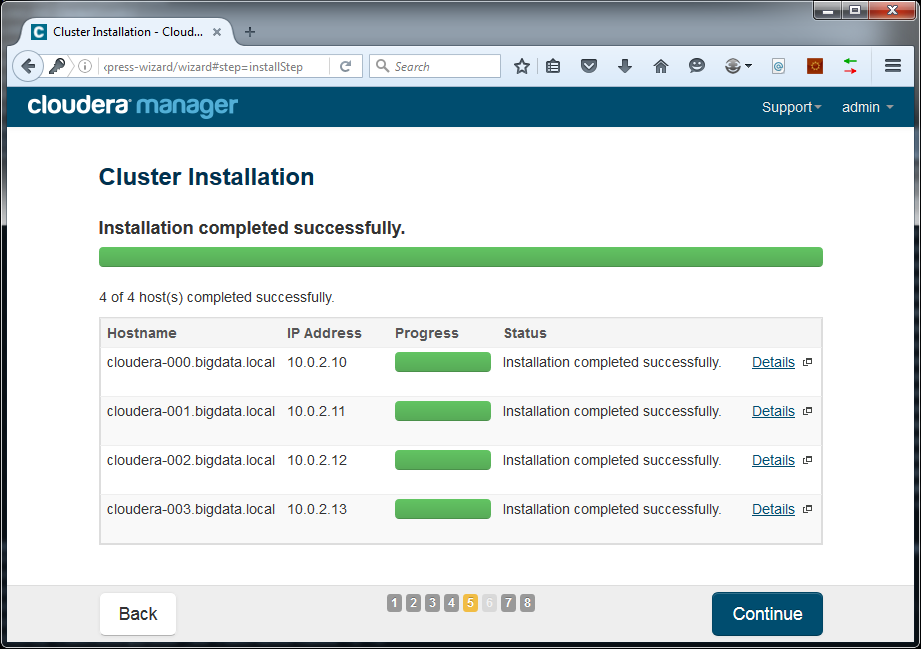
Click Continue. Remote installation of parcels will start:
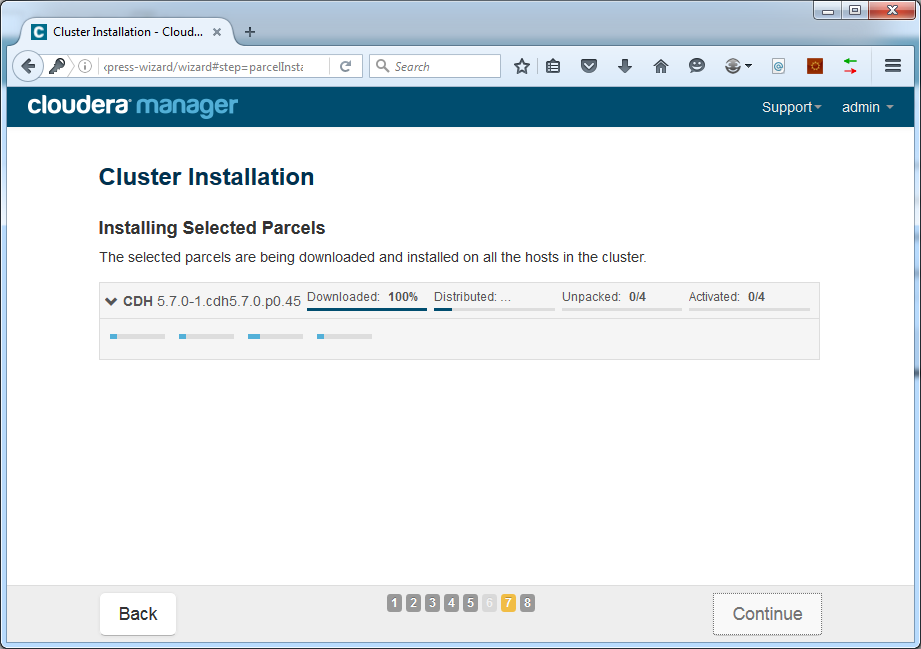
This could take a while. After completion, press Continue. The host inspector will check all hosts:
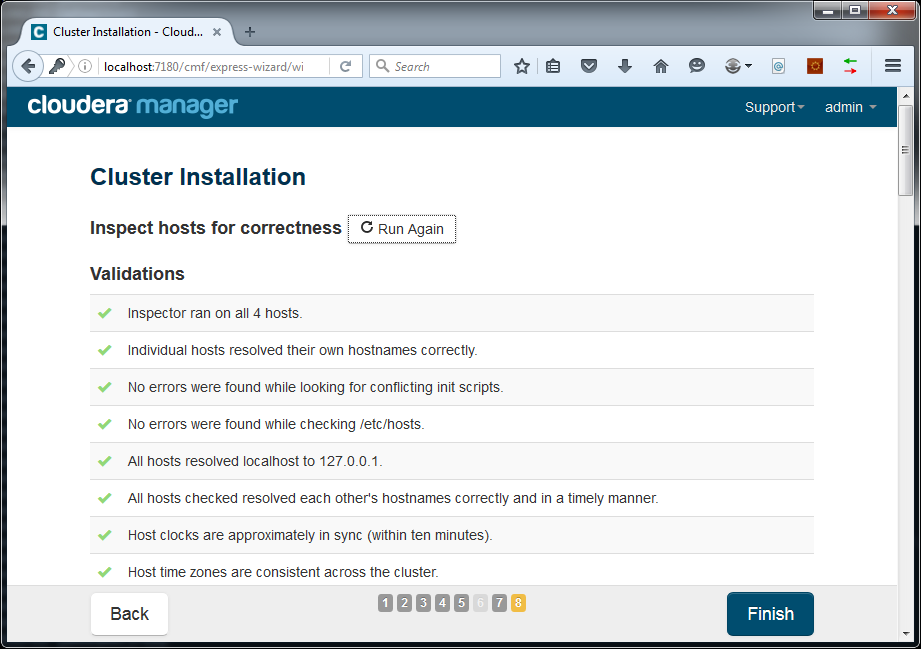
Press Finish. Now we can select the components we want to have in our cluster.
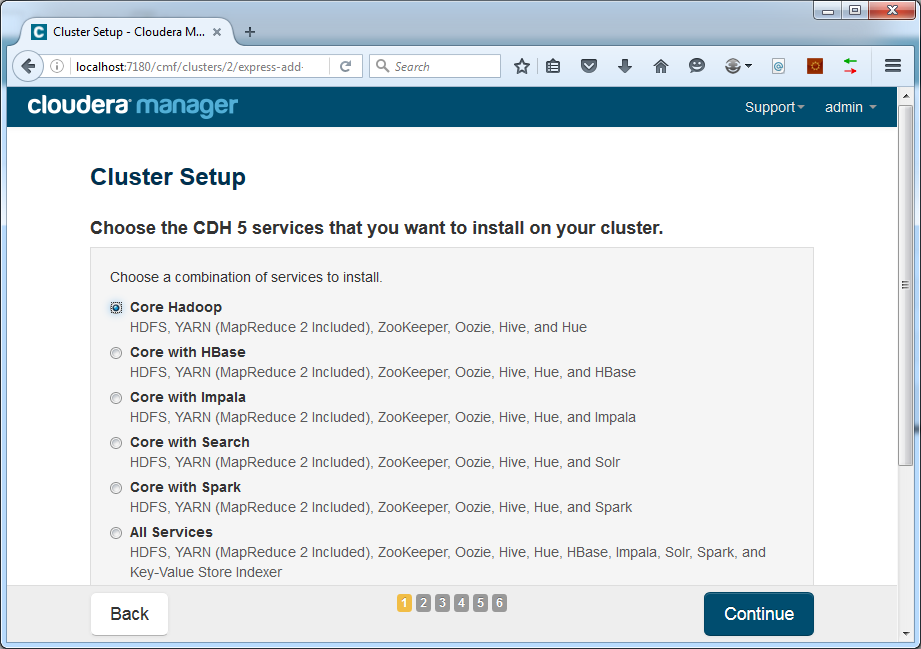
For now we will go with Core Hadoop only. Additional components can be added easily in a later stage. Press Continue. Now we can select the component assignment to hosts:
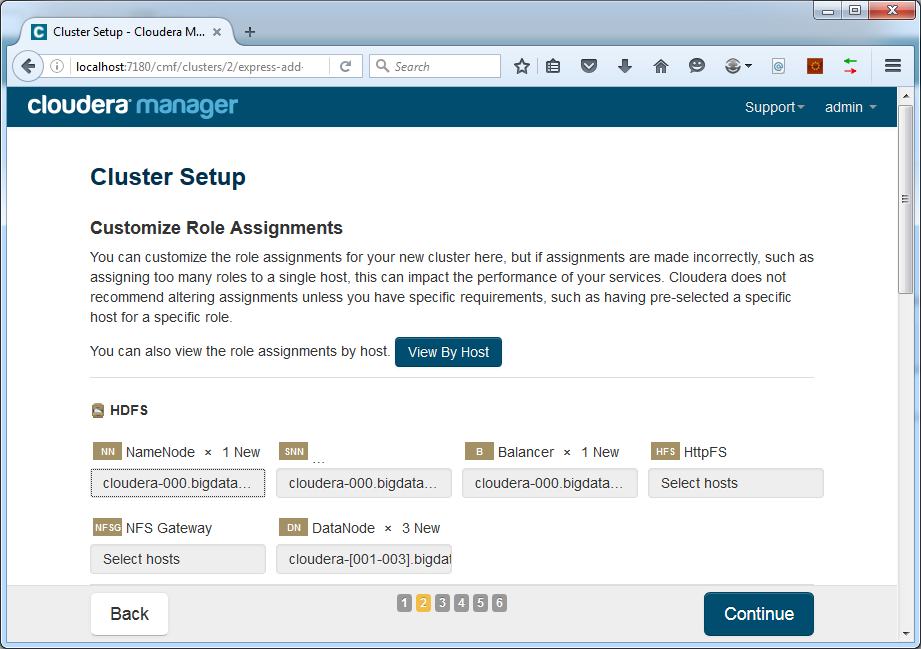
In our case the defaults were fine. Assign all master components to the master machine at cloudera-000 and all worker components to the slave machines at cloudera-001 .. 003.
The components we run on the master machine are:
– HDFS NameNode
– HDFS Secondary NameNode
– HDFS Balancer
– Hive Gateway
– Hive Metastore Server
– HiveServer2
– Hue Server
– Oozie Server
– YARN Resource Manager
– YARN JobHistory Server
– ZooKeeper Server
The components on the slave machines are:
– HDFS DataNode
– Hive Gateway
– YARN NodeManager
You can check by using the View By Host button:
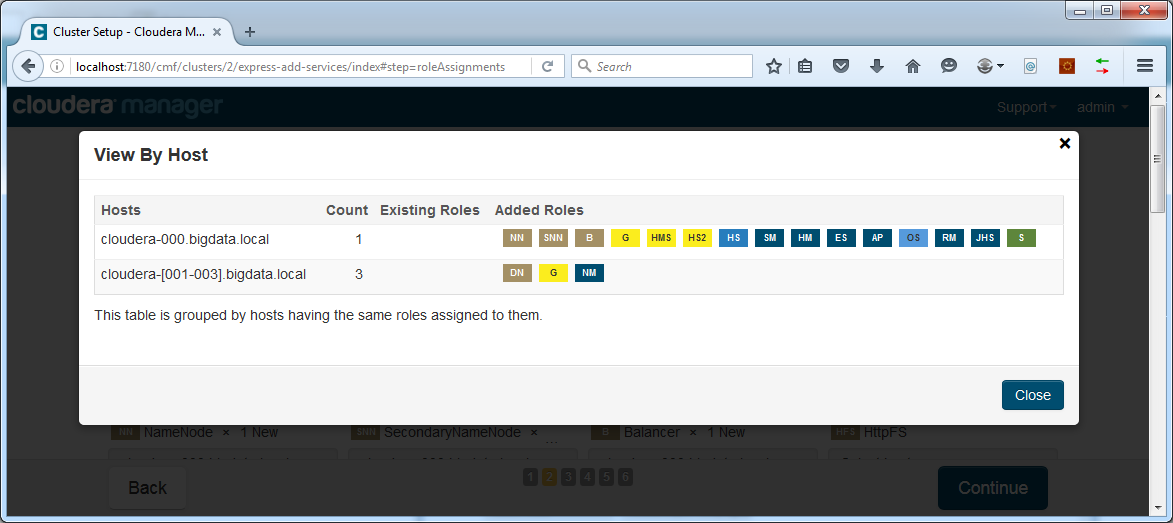
Click Close and then click Continue. The next page will allow to set configuration parameters for the components:
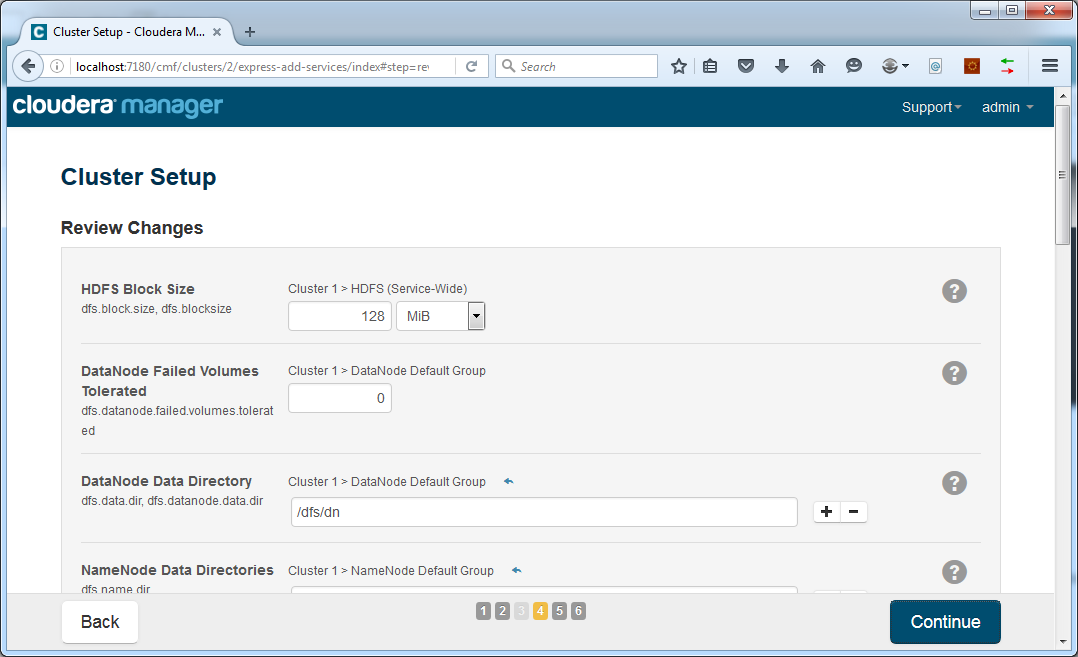
For now we will leave everything at its defaults. Adjusting these settings can be done later through the Cloudera Manager web interface. Click Continue. Installation of components will start:
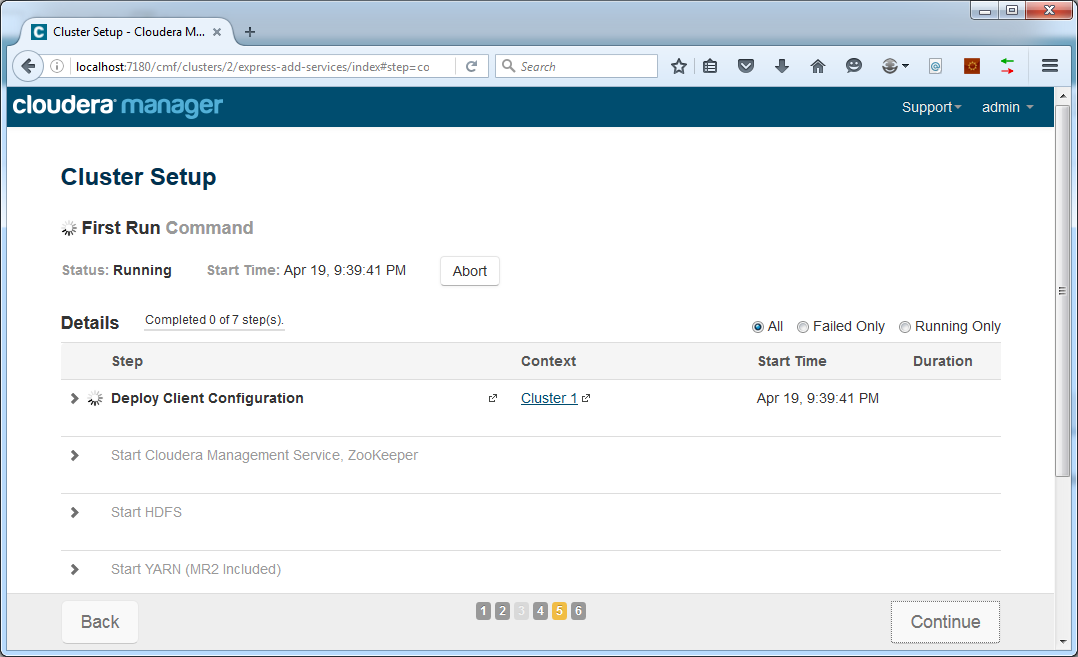
This could take a while. After completion, press Continue. Your cluster is now ready!
Last thing we need to do is change the password of the admin user. In Cloudera Manager, go to the admin menu and choose to change the password:
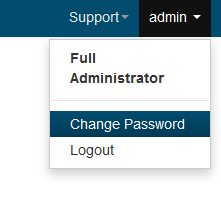
This concludes the setup of our cluster. Next time we will start using it for the first time. We will write our first MapReduce code. Stay tuned!
[ps2id id=’commentaren’ target=”/]
Big Data: is het een hype? Is het een modewoord? Of is het inderdaad de zegen die sommigen erin zien? Wat ons betreft dat laatste natuurlijk. Zeker in een wereld waar klantbeleving steeds belangrijker wordt.
Stay updated
Wij willen je graag op de hoogte houden van het nieuws rondom onze diensten die jou interesseren. Het enige wat je daar voor dient achter te laten zijn jouw mailadres en je voornaam. Vanaf dat moment zullen we je van tijd tot tijd een Ebicus update sturen.
